在 AWS 上使用 Stable Diffusion 给商品更换模特(一)
给商品图片安上模特可以使用 stable-diffusion-inpainting 这个模型来轻松实现。本文探讨使用 AWS 服务来进行流水线方式生产,并最大程度节约使用成本。
模型准备
建议使用云上实例来操作此步,如 SageMaker 的笔记本实例,或者在相关的 region 里开通 Cloud9。在云上操作,下载和上传速度会更快。
下载 Huggingface 模型:stable-diffusion-inpainting
git lfs install
git clone https://huggingface.co/runwayml/stable-diffusion-inpainting
在云上的小机型使用 git clone 大模型的时候会出现 OOM 错误,上述模型大小为 4G,使用小于 2c4g 的实例 Clone 会 OOM。
使用如下命令:
git lfs install --skip-smudge
git clone https://huggingface.co/runwayml/stable-diffusion-inpainting
cd stable-diffusion-inpainting
git lfs pull
在 SageMaker 中自定义推理,需要编写一个 code 目录,并放上 2 个文件:
code 目录下的 inference.py 文件:
import base64
import torch
import requests
from PIL import Image
from io import BytesIO
from diffusers import StableDiffusionInpaintPipeline


def model_fn(model_dir):
    pipe = StableDiffusionInpaintPipeline.from_pretrained(
        model_dir,
        torch_dtype=torch.float16,
        safety_checker = None
    )
    pipe.to("cuda")
    return pipe

def download_image(url, w, h):
    response = requests.get(url)
    res_img = Image.open(BytesIO(response.content)).convert("RGB")
    res_img = res_img.resize((w, h))
    return res_img

def gen(data, pipe):
    prompt = data.pop("prompt", data)
    image_url = data.pop("image_url", data)
    mask_url = data.pop("mask_url", None)
    width = data.pop("width", 512)
    height = data.pop("height", 512)

    image_ori = download_image(image_url, width, height)
    if mask_url:
        mask_image = download_image(mask_url, width, height)
    else:
        mask_image = image_ori


    num_inference_steps = data.pop("num_inference_steps", 30)
    guidance_scale = data.pop("guidance_scale", 7.5)
    num_images_per_prompt = data.pop("num_images_per_prompt", 4)
    prompt_suffix = ",pretty face,fine skin,masterpiece,cinematic light, ultra high res, film grain, perfect anatomy, best shadow, delicate,(photorealistic:1.4),(extremely intricate:1.2)"
    nprompt = 'bad_legs,bad_fingers,(semi_realistic,cgi,3d,render,sketch,cartoon,drawing,anime:1.4),text,cropped,out_of_frame,worst_quality,low_quality,jpeg_artifacts,ugly,duplicate,morbid,mutilated,extra_fingers,mutated_hands,poorly_drawn_hands,poorly_drawn_face,mutation,deformed,blurry,dehydrated,bad_anatomy,bad_proportions,extra_limbs,cloned_face,disfigured,gross_proportions,malformed_limbs,missing_arms,missing_legs,extra_arms,extra_legs,fused_fingers,too_many_fingers,long_neck,signature'

    generated_images = pipe(
        prompt=prompt + prompt_suffix,
        negative_prompt=nprompt,
        image=image_ori,
        mask_image=mask_image,
        eta=0.7,
        width=width,
        height=height,
        num_inference_steps=num_inference_steps,
        guidance_scale=guidance_scale,
        num_images_per_prompt=num_images_per_prompt,
    )["images"]
    return generated_images

def predict_fn(data, pipe):
    generated_images = gen(data, pipe)
    encoded_images = []
    for image in generated_images:
        buffered = BytesIO()
        image.save(buffered, format="JPEG")
        encoded_images.append(base64.b64encode(buffered.getvalue()).decode())

    return {"generated_images": encoded_images}
- 内置定义了部分 prompt 和 完整的 negative_prompt,这些 prompt 可以帮助生产质量比较高的图片,在使用过程中只需要输入你需要的模特提示词即可。
- width 和 height 定义了图片的像素大小,默认 512*512,此尺寸也可以在推理的时候指定,建议不要太大(根据机型的GPU内存不同,太大会溢出),并且尺寸必须是 8 的倍数。
- 商品图片的处理建议:
- image_url: 定义了原来的商品图片,此图片最好是纯白底,当前 SD 模型可以直接重绘白色部分,使用自己作为遮罩 mask。
- 如果你的商品图片是白色基调,那么则需要处理一张遮罩图片,将商品部分涂黑,需要重绘的部分变成白色。
- 商品建议不要充满整张图片,需要将模特的头部留出空白位置,如果需要身体其他部分,也需要留出位置。
code 目录下 requirements.txt:
diffusers[torch]==0.16.1
现在你的项目目录应该类似这样:
~/environment/stable-diffusion-inpainting (main) $ tree
.
├── code
│   ├── inference.py
│   └── requirements.txt
├── config.json
├── feature_extractor
│   └── preprocessor_config.json
├── model_index.json
├── README.md
├── safety_checker
│   ├── config.json
│   └── pytorch_model.bin
├── scheduler
│   └── scheduler_config.json
├── sd-v1-5-inpainting.ckpt
├── text_encoder
│   ├── config.json
│   └── pytorch_model.bin
├── tokenizer
│   ├── merges.txt
│   ├── special_tokens_map.json
│   ├── tokenizer_config.json
│   └── vocab.json
├── unet
│   ├── config.json
│   └── diffusion_pytorch_model.bin
└── vae
    ├── config.json
    └── diffusion_pytorch_model.bin
打包上传 S3:
tar zcvf stable-diffusion-inpainting.tar.gz *

aws s3 cp stable-diffusion-inpainting.tar.gz \
  s3://cloudbeer-llm-models/diffusers/stable-diffusion-inpainting.tar.gz
当前模型整体有 8 G,打包上传这一步对于简中用户会比较痛苦,特别是代码写错的情况下。
我很痛苦!!
部署模型
import boto3
from sagemaker.huggingface.model import HuggingFaceModel

s3_model = "s3://cloudbeer-llm-models/diffusers/stable-diffusion-inpainting.tar.gz"

iam_client = boto3.client('iam')
role = iam_client.get_role(RoleName='HuggingfaceExecuteRole')['Role']['Arn']

huggingface_model = HuggingFaceModel(
  model_data=s3_model,
  role=role,
  transformers_version="4.26",
  pytorch_version="1.13",
  py_version='py39',
)

predictor = huggingface_model.deploy(
  initial_instance_count=1,
  instance_type='ml.g4dn.xlarge',
  endpoint_name='sd-inpainting-try-on'
)
- 使用了 GPU 机型 ml.g4dn.xlarge
- 给 Endpoint 定义了个名称:sd-inpainting-try-on
测试推理
下面的测试在本地 Notebook 中进行的,代码:
from sagemaker.huggingface.model import HuggingFacePredictor

predictor = HuggingFacePredictor(
  endpoint_name='sd-inpainting-try-on'
)

import matplotlib.pyplot as plt
from PIL import Image
import base64
from io import BytesIO


def display_images(images=None, columns=4, width=100, height=100):
    plt.figure(figsize=(width, height))
    for i, image in enumerate(images):
        plt.subplot(int(len(images) / columns + 1), columns, i + 1)
        plt.axis('off')
        plt.imshow(image)

def decode_base64_image(image_string):
  base64_image = base64.b64decode(image_string)
  buffer = BytesIO(base64_image)
  return Image.open(buffer)

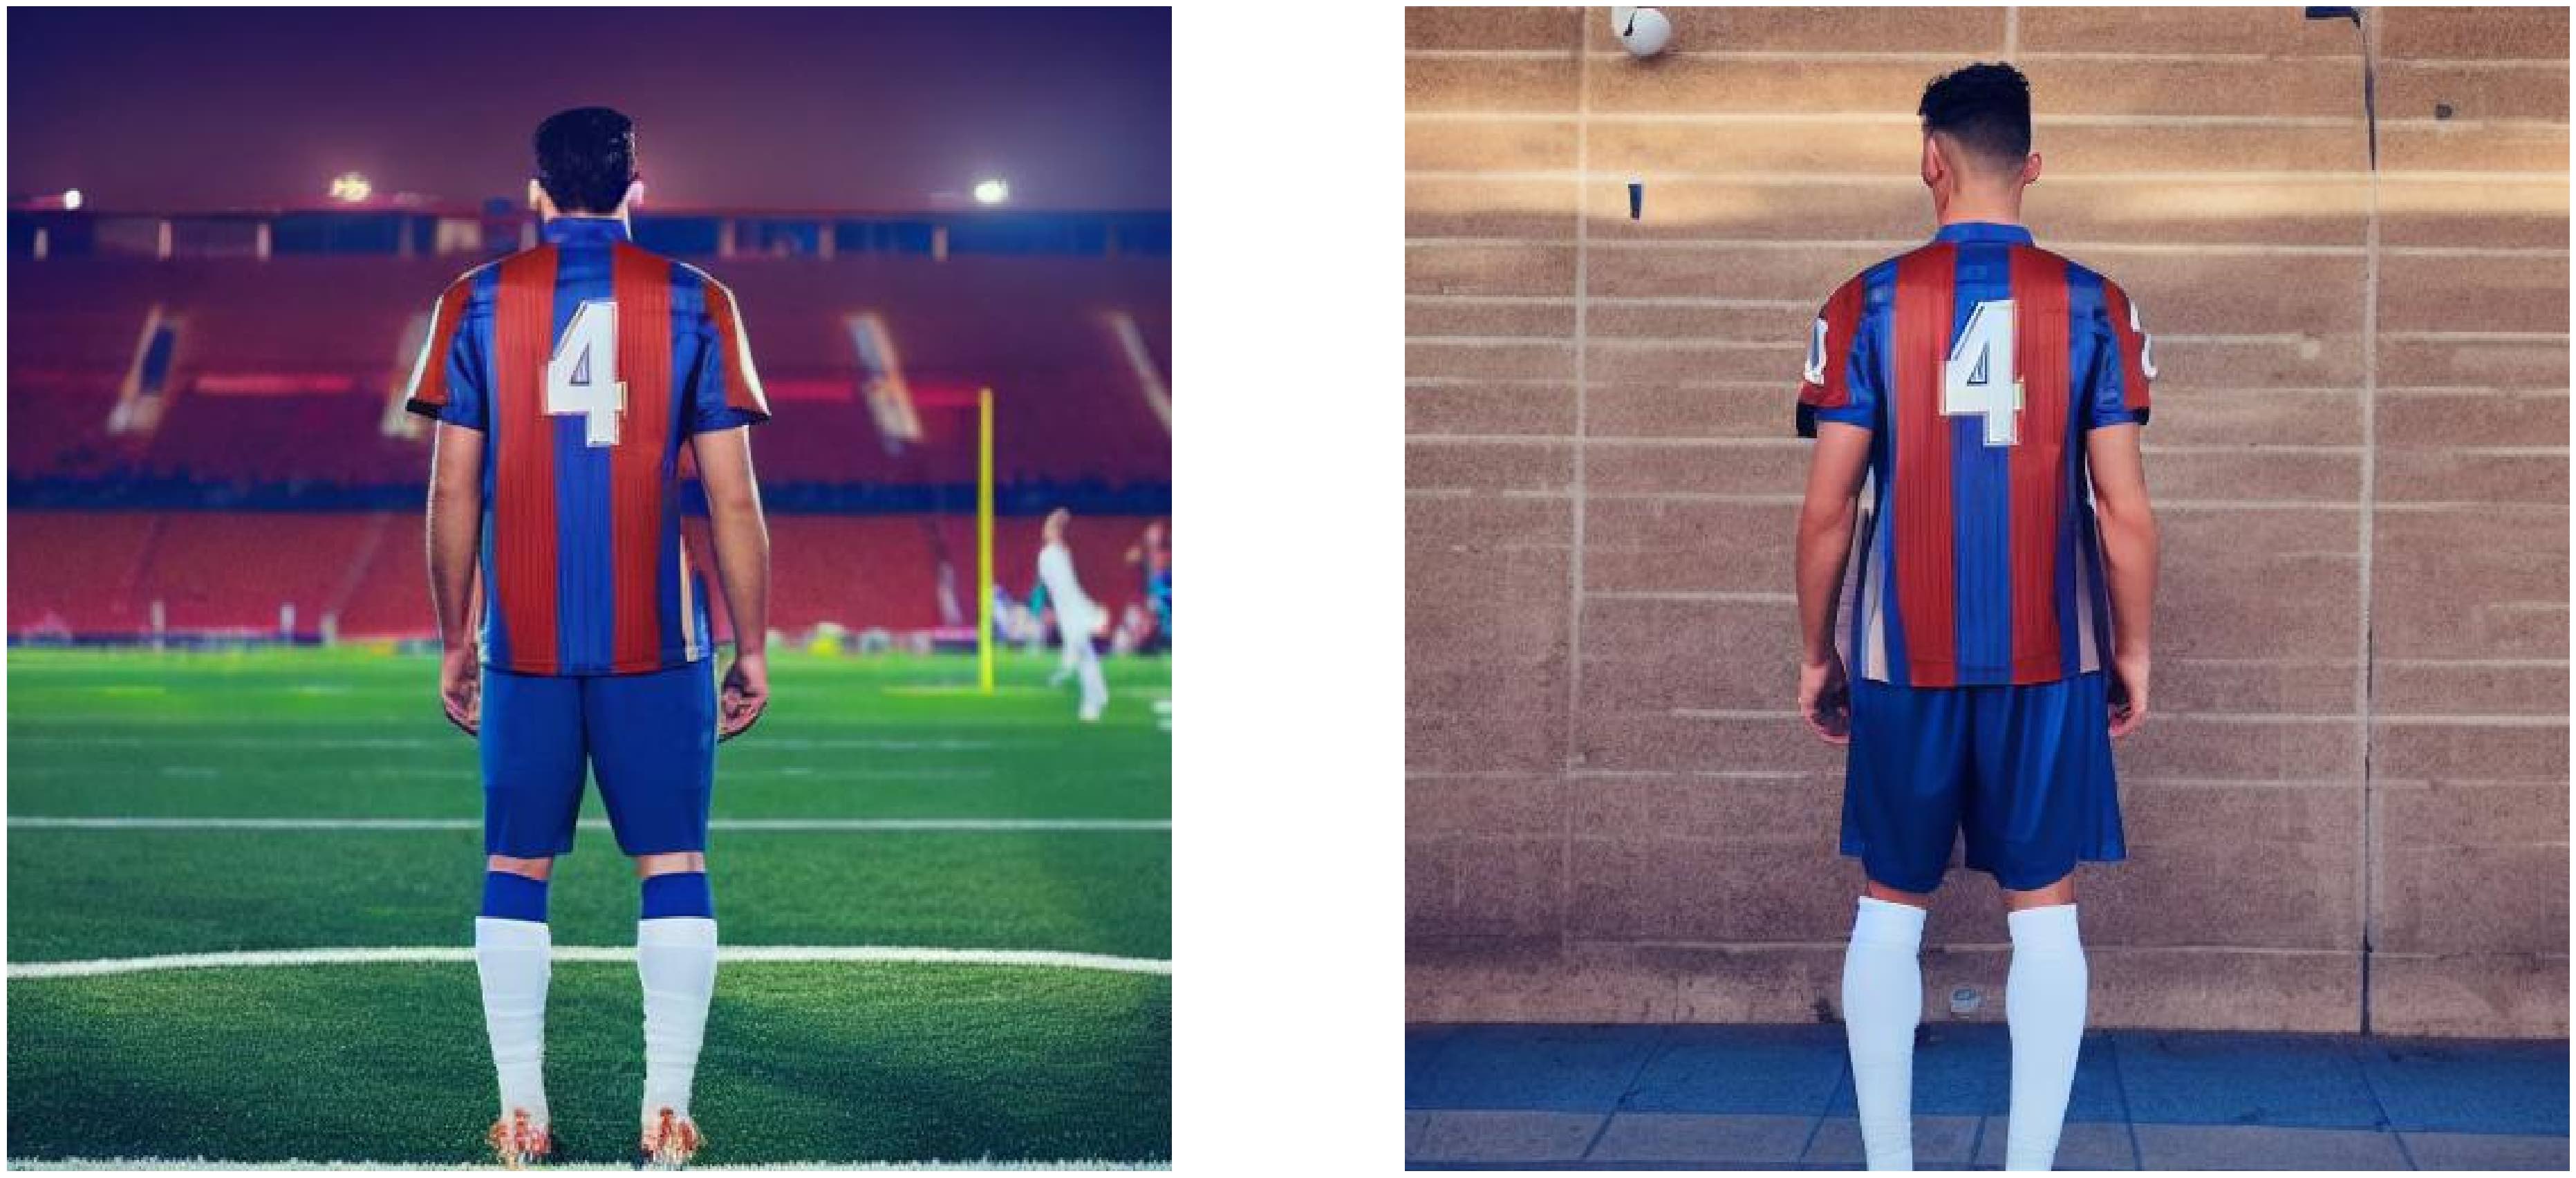
res = predictor.predict({
    "prompt": "a strong man,football field, back view",
    "image_url": "https://d1ffqcflvp9rc.cloudfront.net/samples/images/shirt01.png",
    "mask_url": "https://d1ffqcflvp9rc.cloudfront.net/samples/images/shirt01_mask.png",
    "width": 512,
    "height": 512,
    "num_images_per_prompt": 2
})

decoded_images = [decode_base64_image(image) for image in res["generated_images"]]

display_images(decoded_images)
- 从 Endpoint 的名称
sd-inpainting-try-on中获取一个 HuggingFacePredictor 实例 - 调用 predict 方法完成推理
下面是图片的结果:
| 原图 | 蒙版 |
|---|---|
 |
 |
结果样例

流水线处理
接下来我想设计一个流水线来处理此过程,让图片可以被批量自动处理,处理结束之后,可以自动结束计算资源。
待续…
参考: